Installation Kits & Drill Bits
$8.00
Everything You Need In One Place
Make Your Installation A Breeze
Make Your Installation A Breeze
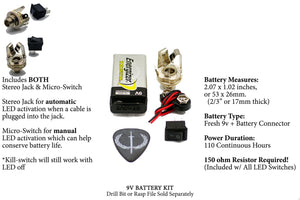
- Here you can find the various kits & accessories to install your killswitch. There's 2 basic kits available for just about any guitar, they are both the same other than the power source used. Both will power your LED for over 100 continuous hours:
#1 - 9v Battery Kit This is perhaps a more common kit since some guitars already have cavities for 9v batteries. If space issues are not a concern, this is a good choice.
The kit includes both a Stereo Jack & a Micro-switch. You can use either one depending on how you want to wire the LED of your switch. The stereo jack will allow you to automatically turn on the LED when a cable is plugged into the guitar, and the micro-switch lets turns your LED on or off whenever you want.
Please note that the kill-switch can still operate even with the LED turned off or left disconnected. Drill bits are available separately (see drop down menu)
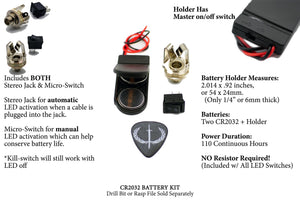
#2 - CR2032 (Slim) Battery Kit If you have a guitar like the Ibanez S series, or are running tight on space, this is the better kit. These include a battery carrier, two CR2032 batteries, and both Stereo Jack & Micro-switch.
The profile is much thinner than a regular 9v so you get the benefit of space savings. When one of these kits is used, the included inline resistor (LED models only) is not required for installation. The resistor is only required when using a 9v.
Both Kits are $7 each - Drill bits are available separately -
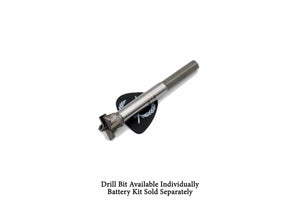
Our drill bits are made from steel, and can be used to install any and all Iron Age kill-switches. Drill bits are sold separately from the installation kits.
Why use this style of drill bit?
The "Forstner" style bits have a center guide pin that helps to stabilize the spinning bit as it cuts. The result of these bits is a very smooth accurate cut while other bits can have a less-than-desirable rough edge.
To obtain the best results, it's recommended that you drill from the top of the guitar into the electronics cavity. This will ensure the cleanest cut where it matters most.
Quick Tip: Before you start, it helps to lay down some painters tape to protect areas around the drilling point.
Also, you can make an indentation exactly where you want to start using the bit's center guide pin.This will help to keep the bit exactly where you want it once you begin to drill.
Light pressure is best to let the bit do the cutting of the guitar finish before applying a moderate pressure once you're down to the actual wood.
The drill bit diameter is 16mm & can be used to install ALL of our switches.
Each drill bit is $7
*Drill bits are sold separately & are not included with any of the installation kits. -
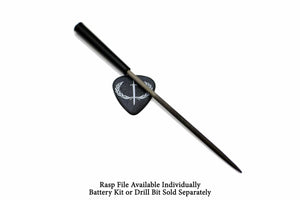
Needle Rasp Files are now available for enlarging potentiometer holes in order to fit a killswitch. This is the preferred method to use for those wanting to replace their tone knob for a killswitch instead of trying to drill a larger hole without a drill press.
**Our forstner bits are not recommended for hole enlargement as they require material to grab onto at the center for guidance.
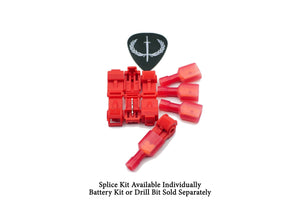
Splice Kits For those who aren't solder-savvy or don't have the tools at hand, splices are available. Each splice kit has a total of 4 splices. These are best for non-LED kill-switches where you can simply tap into the ground & hot wires at the jack instead of soldering onto the leads.
If you have an LED model switch, some soldering would still be required for the resistor & maybe the battery connector wires. To make these work, all you need is some pliers.
The terminal ends get crimped onto the wires of your kill-switch.
Next the folding splice gets wrapped around the wire you wish to tap into (ground & hot wire coming from the jack).
Once the wire is seated in between the metal blade, firmly close the splice until it snaps shut.
Finally connect your kill-switch wire with the terminal attached to the side of the splice until it seats firmly.
Needle rasp files are $3 & Splice kits (4 Splices) are $2
You may also like:
"Quality is never an accident.
Only High Intention. Sincere Effort. Skillful Execution.
Built on purpose, held on purpose."
— The Iron Age Standard
- Contact
- The Oath
- Sword & Laurel
- About
- Shipping Info
- Returns & Warranty
- Account
- Rewards
- Endorsement
- Wholesale
- Privacy
- Terms
Sign up for the Iron Age newsletter to Save 15% on your 1st order, plus get exclusive offers, product updates, and early access to giveaways!
© 2026 Iron Age Guitar Accessories.
Est 2015.
